

Computer Controlled Cutting |
|
| Introduction :: | |
Computerized cutting machines are used where high volume of garments is manufactured. This machine cuts fabric layers as per command given in computer system. Automatic cutting machine is also known as CNC machine. Numerical control (also computer numerical control, and commonly called CNC) is the automated control of machining tools (such as drills, lathes, mills and 3D printers) by means of a computer. A CNC machine processes a piece of material (metal, plastic, wood, ceramic, or composite) to meet specifications by following a coded programmed instruction and without a manual operator directly controlling the machining operation.
It has a knife which is mounted on a CNC arrangement for linear motion. The knife can rotate on its axis and the bed has rollers for moving the sheet back and forth. The sheet is cut by moving knife over it.
|
|
This week, I learned how to use the vinyl cutter (GS-24 Deskatop Cutter) and the laser cutter (Epilog Laser Fusion M2) in the FabLab, STPI Bhubaneswar. Thanks to our instructor, I could learn the detailed process of running each machine combined with using 'mods' and CorelDraw. |
|
| Vinyl Cutting | |
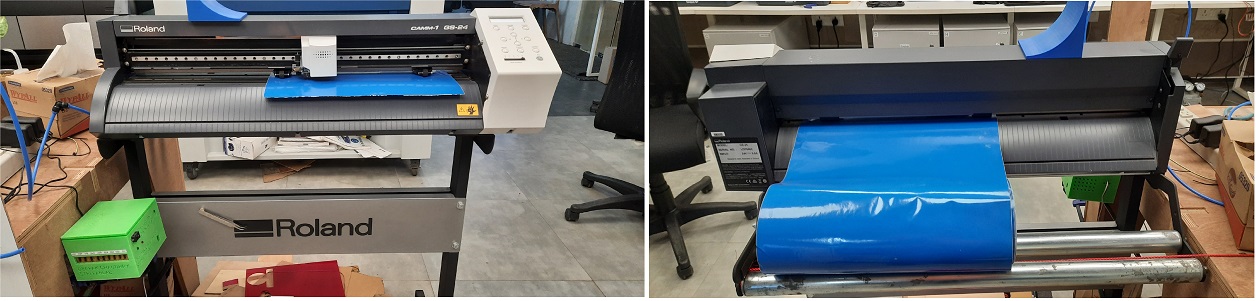
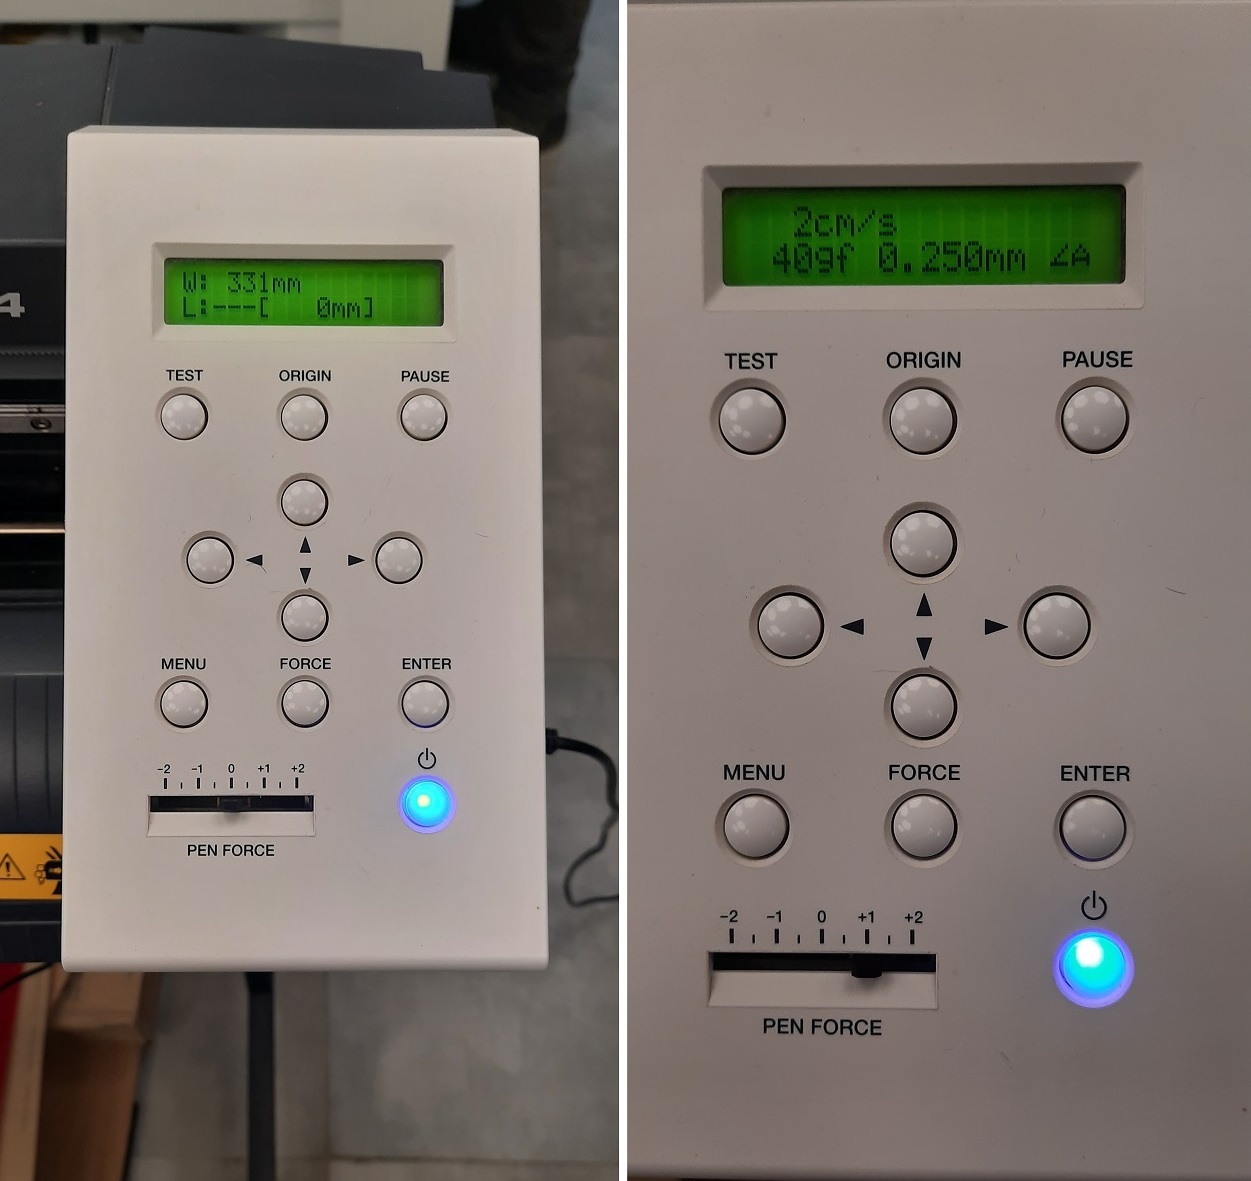
A vinyl cutter uses a computer-controlled blade to cut out shapes designed using vector graphics. Mr. Sibu Saman, our instructor briefed and guided about all the technical and the use cases of vinyl cutter like how it cuts, blade movements, caster angle, types of blades to use, fab modules, weeding, transfer tape etc. In our lab, we have the Roland CAMM-1 desktop vinyl cutter. It has a knife which is mounted on a CNC arrangement for linear motion. The knife can rotate on its axis and the bed has rollers for moving the sheet back and forth. The sheet is cut by moving the knife over it. We can set the cutting velocity and cutting force depending on the material of the sheet we are cutting.
|
|
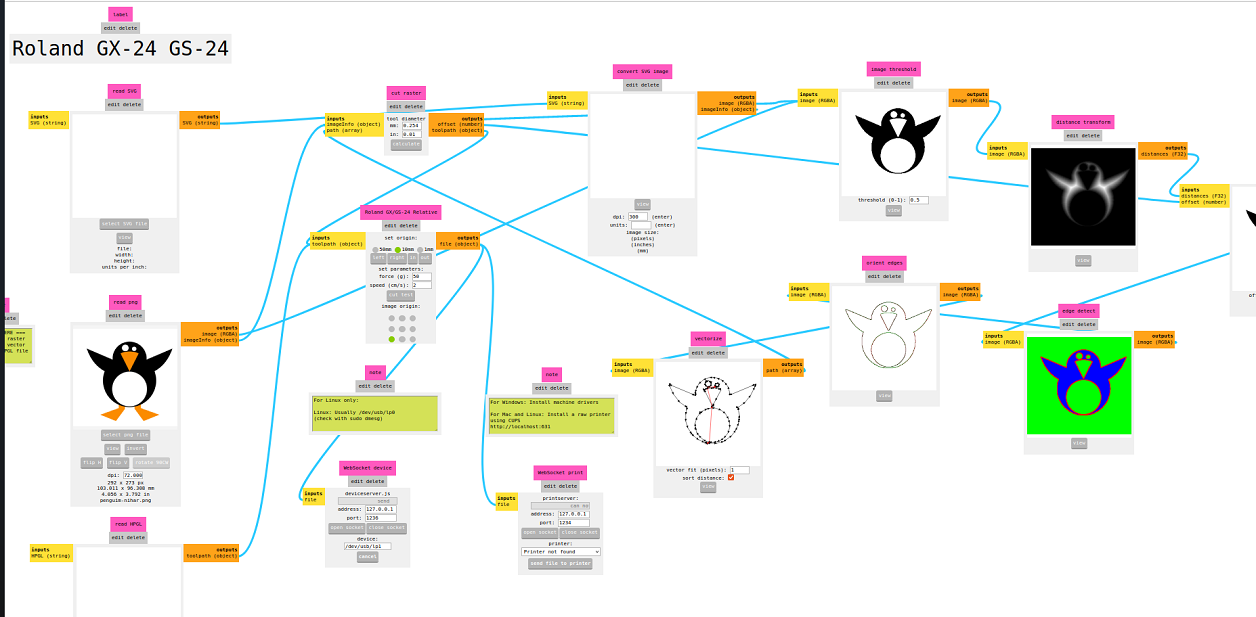
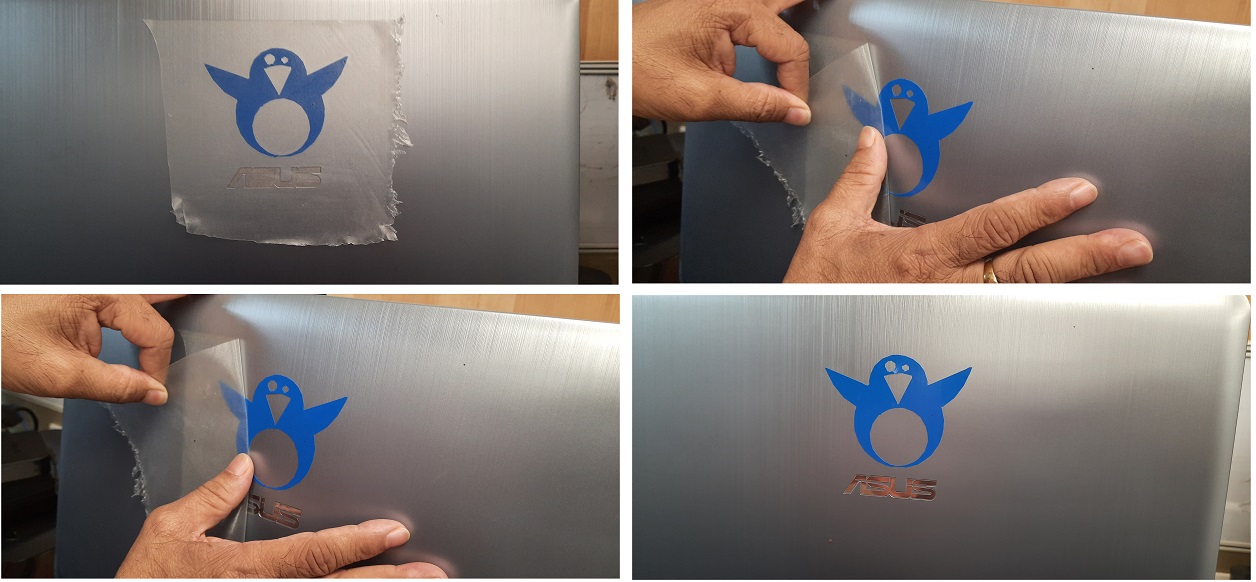
For cutting in Roland Vunyl Cutter, I have imported one penguine image from the library and imported to the Inkscape and made a plan to make necessary changes to make the cut. |
|
 |
|
| Designing files for Vinyl Cutter | |
Since, Inkscape a open source tool is used for creating the design that to be fed into the machine.Firstly I planed to make logo of a penguine then,I decided to cut in Roland GS-24 Vinyl Cutter. |
|
Ok, Lets Cut. |
|
First, you need to install Mods |
|
 |
|
 |
|
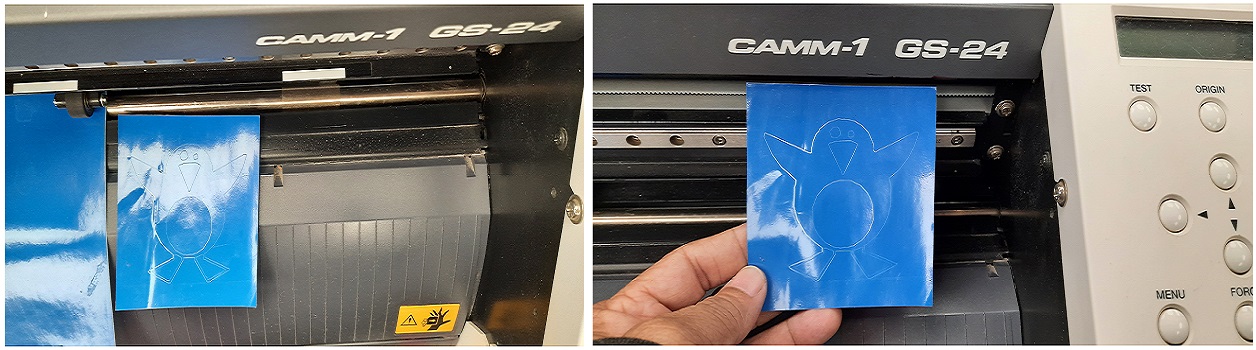
OutPut after cutting |
|
 |
|
 |
|
Getting started with Laser cutter |
|
Laser cutter is type of CNC (Computer Numerical Controlled) with a laser beam. The active laser medium (laser gain/amplification medium) is a gas discharge which is air- or water-cooled, depending on the power being applied. The filling gas within the discharge tube consists of around 10–20% carbon dioxide (CO2), around 10–20% nitrogen (N2), a few percent hydrogen (H2) and/or xenon (Xe) (usually only used in a sealed tube), and the remainder of the gas mixture helium (He). The specific proportions vary according to the particular laser. |
|
Laser Cutting Parameters |
|
Laser power- P : They can be set as a percentage between 0 and 100%. 100% is maximum power. For dark wood engravings or stamp engravings, you generally need high power, whereas low values are used for materials such as paper. |
|
Cutting Speed-V : The Speed laser parameter describes the movement of the laser head. Fast speeds lead to short exposure times, slow speeds lead to long exposure times. For example, large-scale engravings of TroLase materials are engraved at high speeds between 80 and 100%, but for photo engravings with lots of detail on wood, the speed should not exceed 10%. This setting also affects the quality of the laser cut. |
|
Number of Passes-N : The Pass parameter determines the number of engraving or cutting passes. With some materials, for example, it can be advantageous to engrave with lower power and high speed, and then repeat this process several times. This means that the material is less stressed per pass. For example, this approach is appropriate for a relief engraving. |
|
Pulse frequency: As with the laser power, the pulse frequency can be matched to the relevant machining task. For example, it is recommended small contours are cut with reduced pulse frequency. The pulse frequency is also reduced when piercing in the ramp mode. |
|
Kerf : The laser burns away a portion of material when it cuts through(tool thickness). This is known as the laser kerf. More info click here. |
|
Things to be careful using a Laser Cutter: |
|
1. Machine must not be left unattended while it is operating (supervised operation). |
|
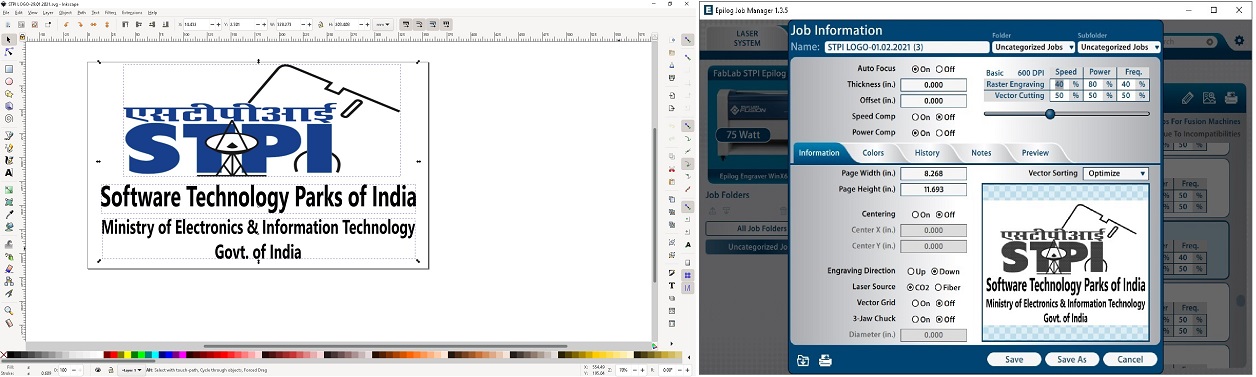
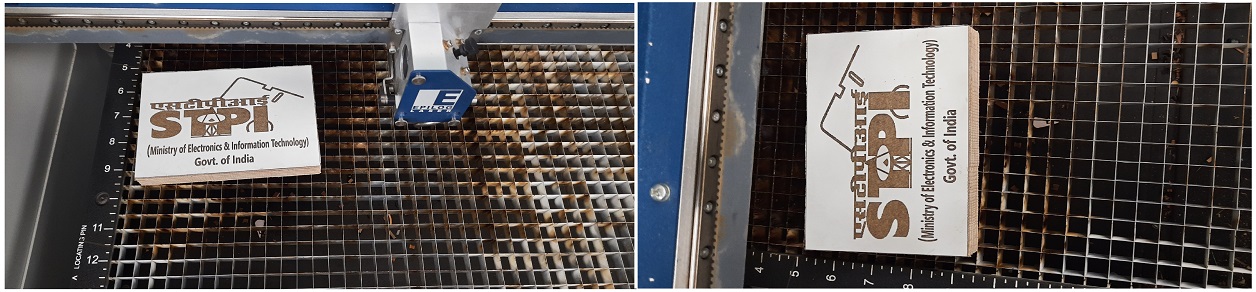
Now, after going through careful study of various manuals, I started to do something using the Epilog Laser M2 which is available in my lab. I started the design of my STPI Logo for engraving. I designed the file in Inkscape and connected to the Epilog Laser. After connecting with the Laser I saved it as .SVG as well as in PDF format. I have opted for 16 mm Playwood to engrave the logo and I assigned the parameters for the final design. |
|
 |
|
 |
|
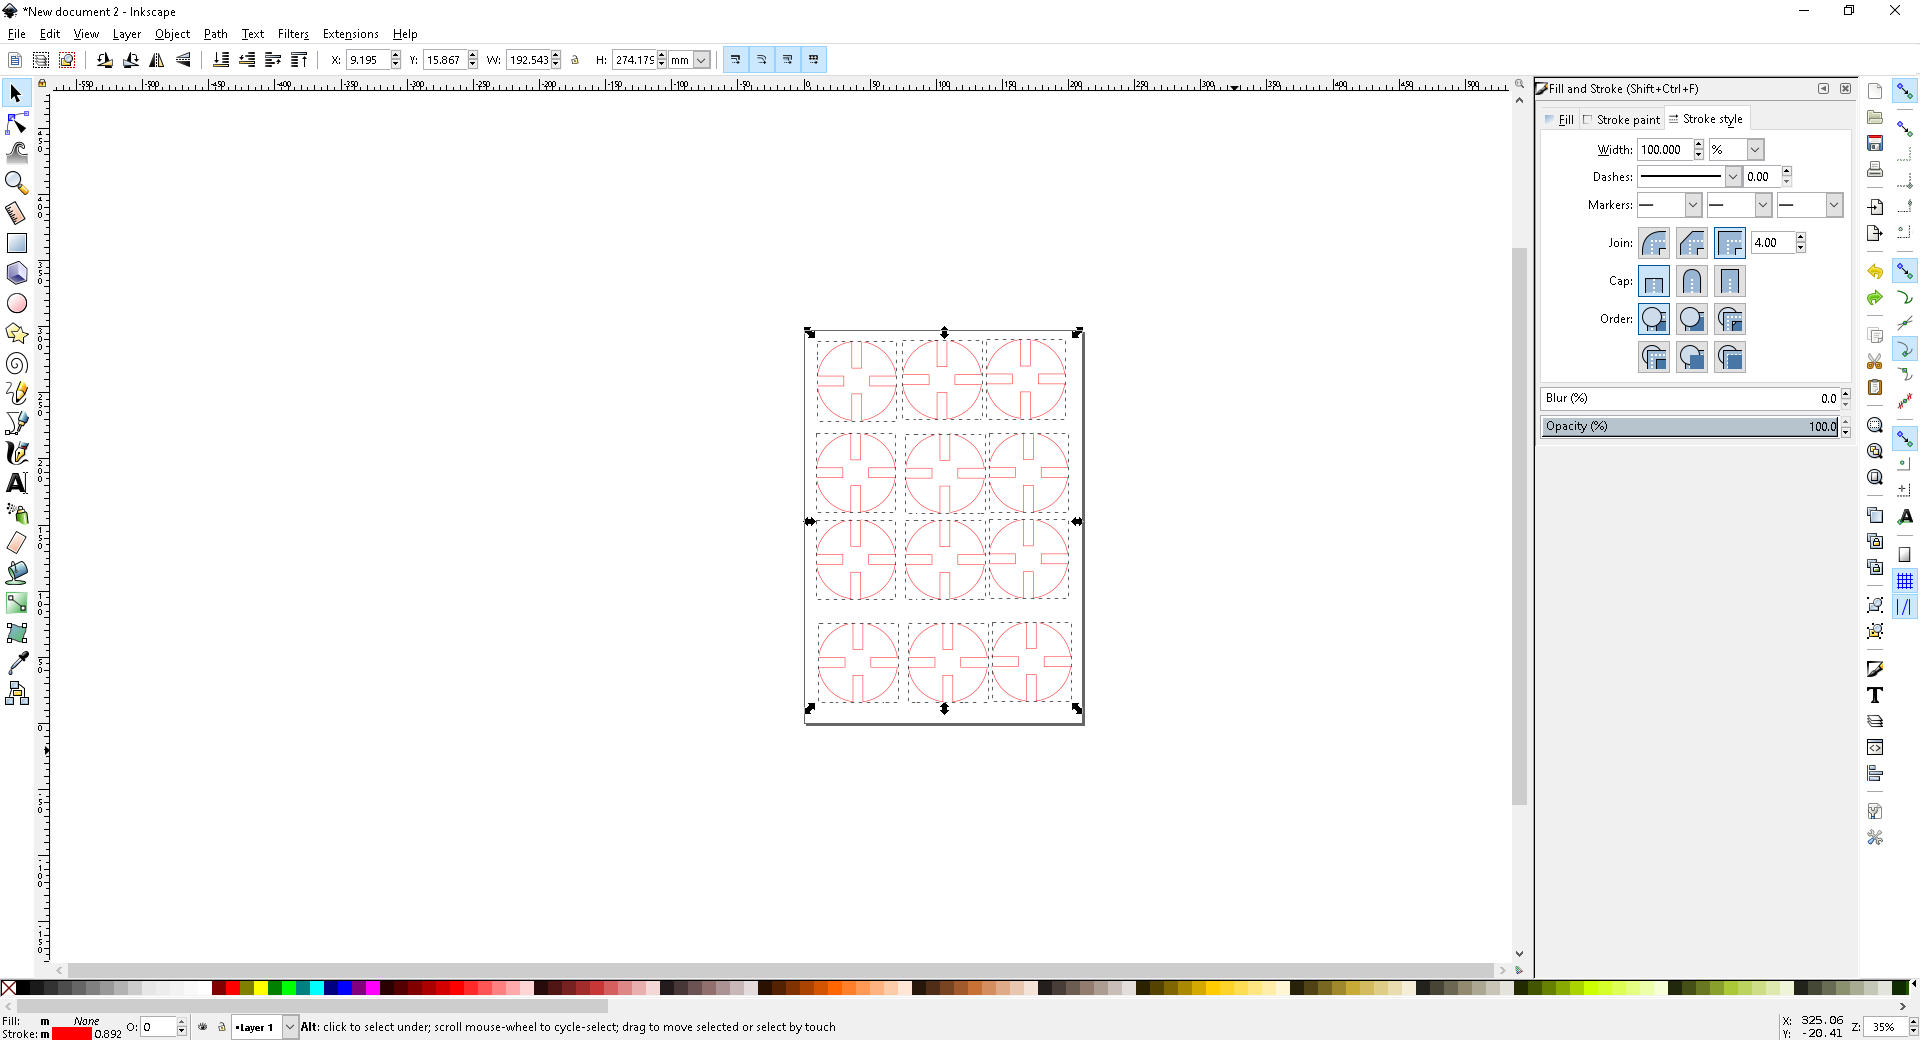
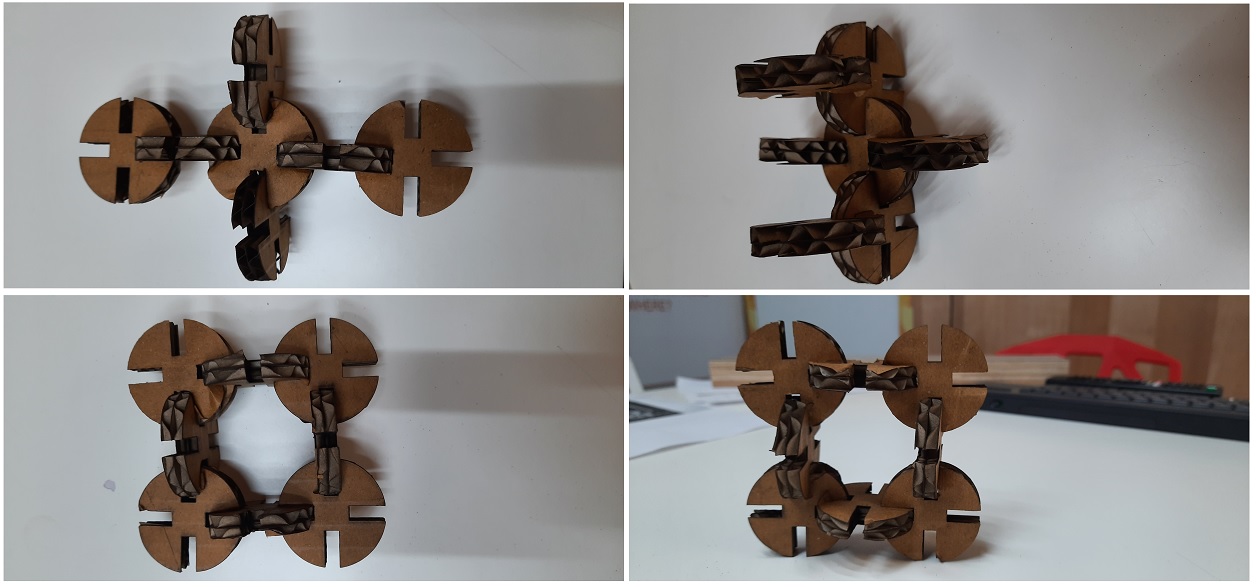
Press Fit Constrcution Kit |
|
Safety Measures: Our Prof. Neil & Instructor always says, the laser should not be left unattended. As laser is very sensitive to fire and also a very important that proper measurement of designing and proper setting of speed, power and frequency as per the material then only do cut or else it may goes wrong. Every time after finishing of the work, you have to clean the rules, the bee panel and every so often clean the lens. The extraction of the gases is done outside, but the proper functioning of the extractor and the compressor for the air assist must also be checked. |
|
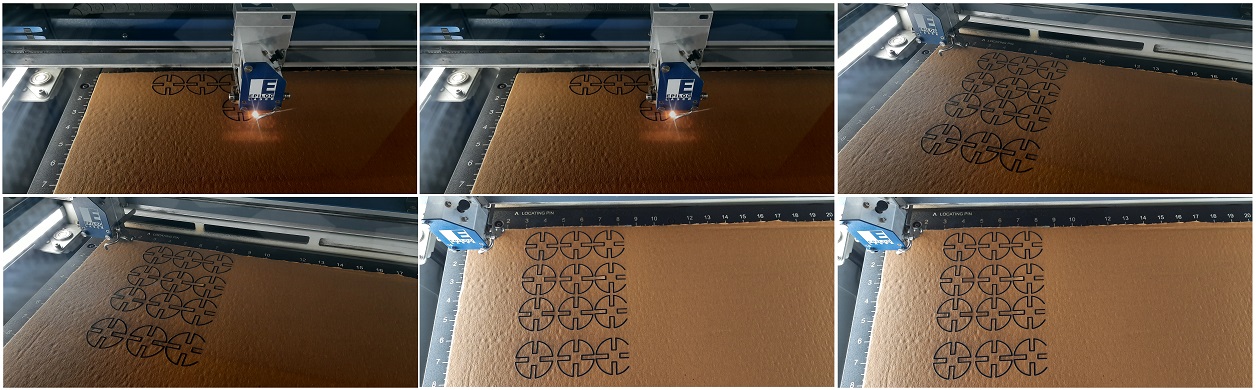
The objective of this exercise is to design and fabricate a Press-fit Construction Kit by using Epilog Laser. I have used the material of 3 mm cardboardfor the job in order to make it flexible. |
|
Setting up the Machine |
|
1. The very first step is to turn on the laser machine and the filter machine and the material is placed inside the laser cutter. It should be ensured that the material is properly placed. |
|
 |
|
 |
|
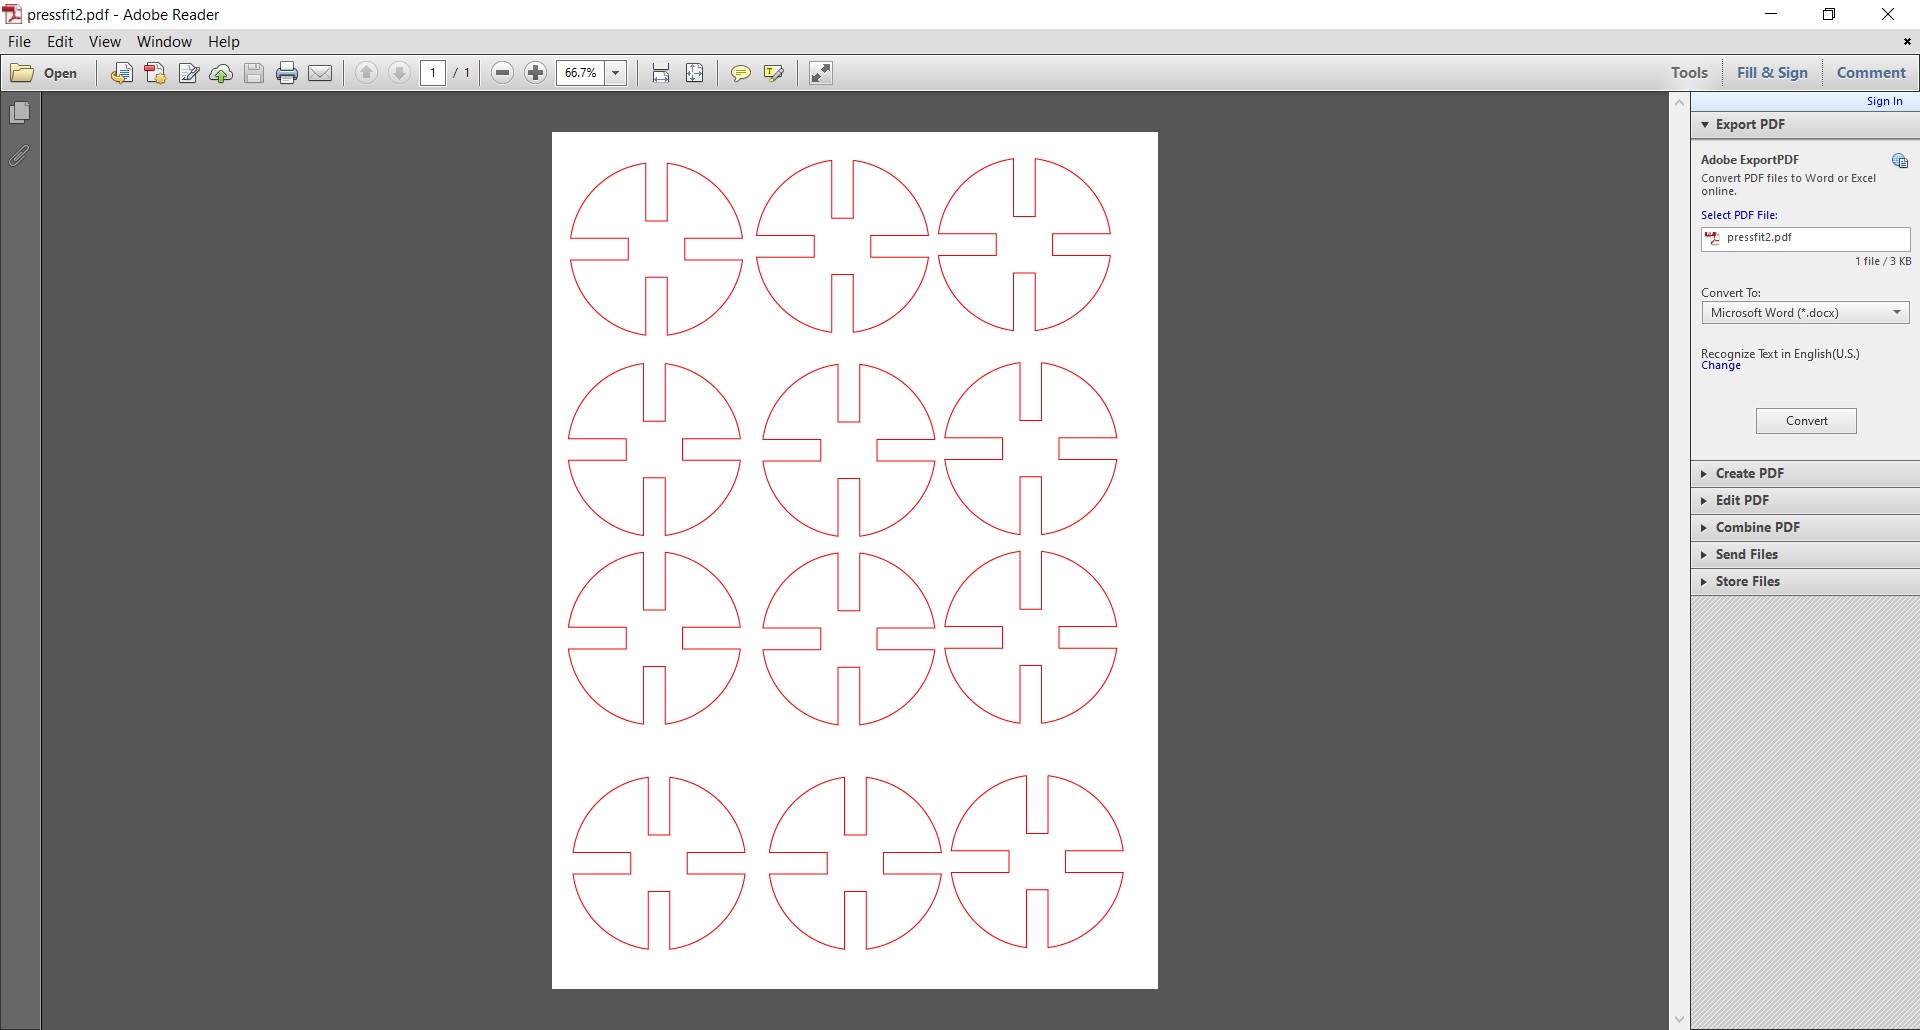
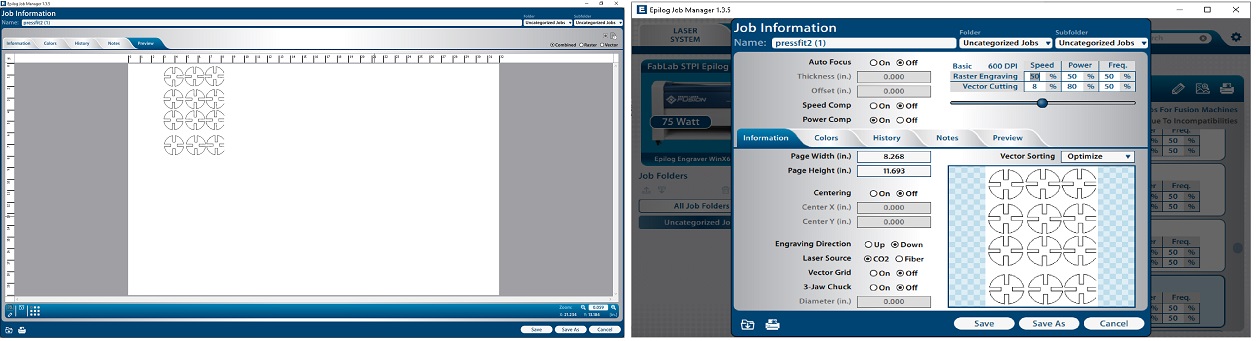
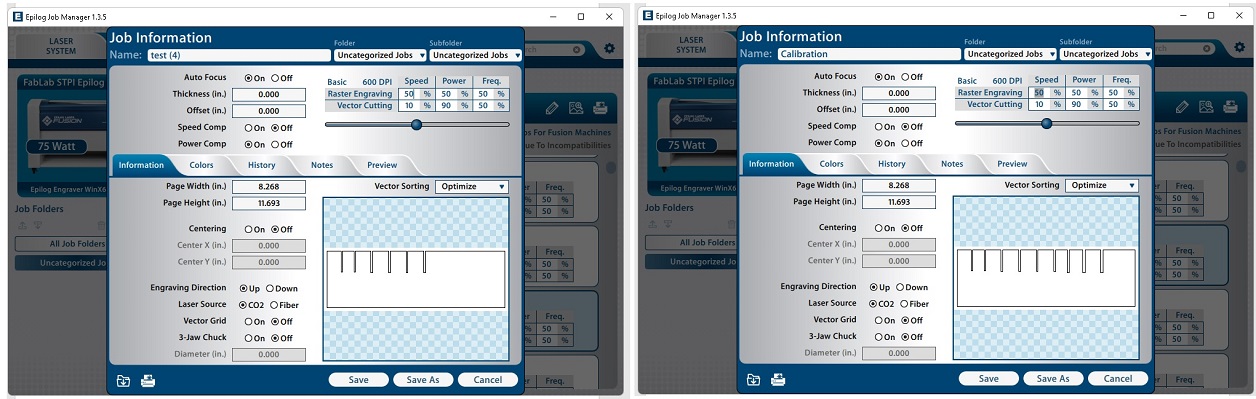
| After the completion of the design, i gave various parameters and saved in PDF format. After saving the i have connected the Epilog Laser Printer to the system for cutting the board. After giving the command for print, I have set the various parameters like Speed, Power & Frequency for vector cutting. The details of parameters for vector cutting is as follow: | |
 |
|
| Here I used the same parameter as in press fit and Kraft test for vector cutting Dots per Inch (DPI) -600 Speed -8% Power -80% Frequency-50% |
|
 |
|
 |
|
Various Designs made with Press Fit with Card Board |
|
 |
|
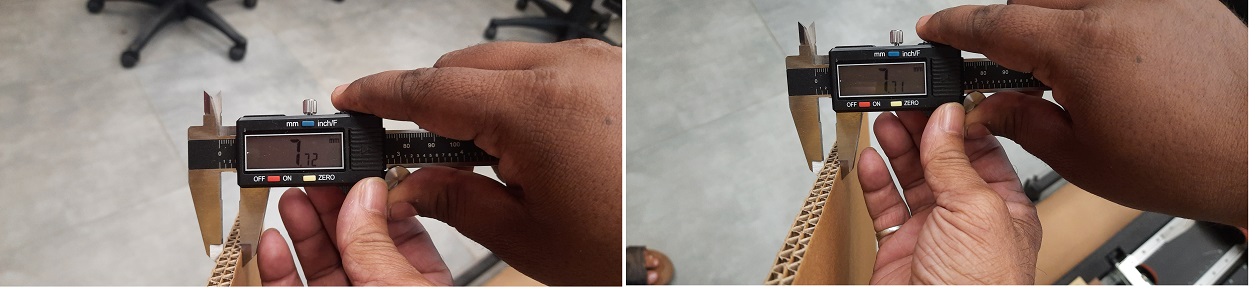
Kerf Test |
|
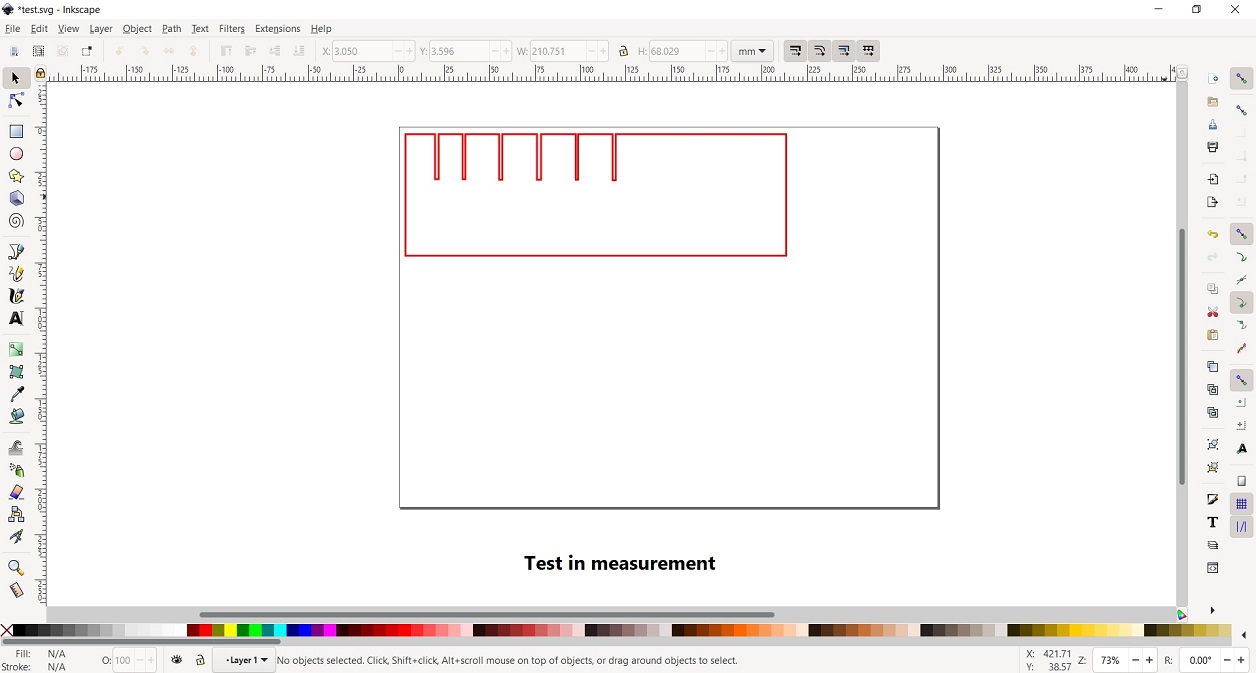
After performed the press-fit test with veneer board, I planned for a kerf test for sunmica board wood material of small size as a sample. I design it with Inkscape and in the test I will have a 10mm by 10 mm square to check the measurements with the caliber. |
|
 |
|
 |
|
 |
|
 |
|
Download Files |
|